Expert Tips The Division 2 Doesn't Tell You

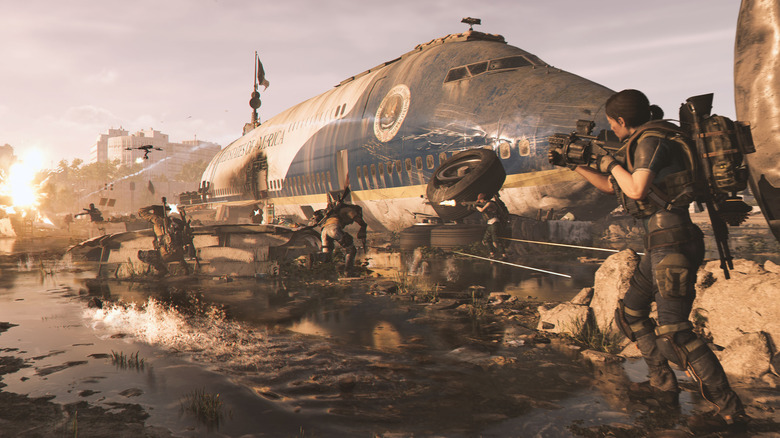
Recently, Ubisoft released Tom Clancy's The Division 2, a sequel to their 2016 third-person shooter RPG. After the success of the series' first iteration, this new entry offers the same type of cover-focused gameplay, albeit with more high-level content and quality-of-life tweaks that help make the game feel more polished. Set in Washington, D.C. about seven months after the virus that set in motion the events of The Division, you and your friends must prevent enemy factions from taking over the city, while simultaneously trying to help rebuild it.
As a multiplayer shooter with RPG elements, some might find the sequel's mechanics and gameplay systems overwhelming at first, especially because there's so much content to absorb. From skills and perks to settlements and projects, you'll have to learn about all of it in order to succeed. Well, this article is here to help aid you in your journey through the nation's capital. These are the expert tips The Division 2 doesn't tell you.
Save your low-level exotics
During your journey to Level 30, you'll find more gear than you'll know what to do with. While there are plenty of options for how to use or dispose of that loot — upgrading, donating, or dismantling — there will be some pieces you'll simply want to place in your stash until after you reach max level. If you preordered an edition of The Division 2 that offered some special bonuses, you likely received a low-level exotic weapon. For most, that was The Lullaby, a shotgun that you outgrow almost instantly. Others received some special exotics in various DLC packs for picking up the Gold or Collector's Editions.
Regardless of which guns you received, you should keep those exotics in your stash even after you outgrow them. There will certainly be the temptation to dismantle them for crafting materials, but that's the wrong decision. Because you can't craft exotic weapons from blueprints, these high-tier items will be harder to come by. However, you can upgrade your existing ones at the crafting station, and doing so after reaching Level 30 means you'll immediately have access to strong weapons for endgame missions. Sure, you're playing the long game by holding onto some temporarily useless guns, but it will be worth it eventually.
Prioritize crafting mods over weapons early on
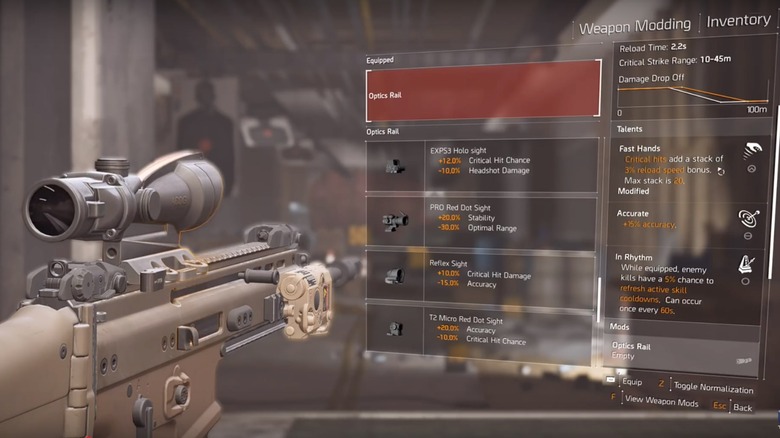
In the early stages of the game, you'll unlock the crafting station, which allows you to build weapons and weapon mods using blueprints and materials you find throughout the game world. You'll receive multiple blueprints in the first few hours; weapons will usually come from main missions or projects, while mods often drop from side missions. While you'll likely be enticed by the first blue weapon blueprint you can craft, don't waste your materials. There are so many missions and activities to do throughout Washington that you'll find better weapons than what you crafted in mere minutes.
Instead, focus on finding mod blueprints and unlocking the mod-related perks from the Quartermaster. This way, you can invest your materials into creating attachments that you can use on your existing weapons as well as any future weapons you receive. These are a much better use of resources early on because they can provide major stat boosts and are also reusable, meaning you only have to craft them once.
Customize your HUD
One of the nicest traits about The Division 2 is the ability to customize the game's UI in a multitude of different ways. PC players will probably be used to this, but console gamers will definitely find that there are more customization options than one would expect from a third-person shooter. For example, the game allows you to modify the HUD (Heads-Up Display), offering you the ability to position the various elements any way you want. To do this, you need to head to the UI section of the game's "Settings" menu. Once you're there, you simply select the "Customize HUD" option and go to work.
You can move everything on the HUD, from the minimap to your group player information. A good idea is to reposition the map if it's something you heavily rely on. By default, the game places it in the top left corner, but because you'll spend a lot of time outside during the day, that map often gets washed out and hard to see when it blends in with the sky.
Change your inventory to grid view
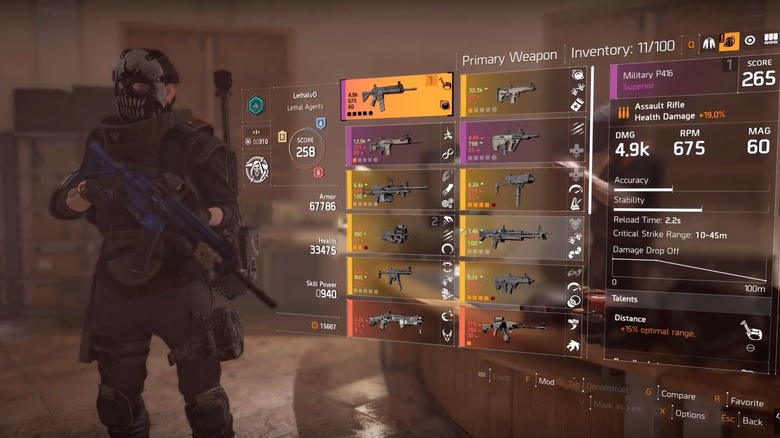
Another quick and easy way to better your game's UI layout is by changing your inventory view. Thankfully that clunky eyesore of a list that The Division 2 defaults to isn't the only way you can structure your inventory. After not giving players any option to do so in the first game, the sequel offers a setting that changes your the normal layout to a grid view, making it easier for players to organize their loot and see exactly what they have without scrolling down over and over again.
To change to the grid in your game, simply press the left stick (PS4, Xbox One) or "X" (PC) when looking through any individual item section (primary weapon, backpack, etc). This will pull up a short menu that includes "Inventory Options," one of which allows you to switch your layout. Keep in mind that you'll have to use this process to change the setting, as there's no way to do so in the main menu.
Revisit the control points
When not doing main or side missions, you can still find plenty to do in The Division 2. If you're looking for a quick challenge that will give you access to quality loot, start capturing Control Points. These areas throughout the map are run by the various enemy factions, but can be taken and controlled by you and your friendly NPCs after some tough but fun skirmishes. Think of these points like the Outposts found in the Far Cry series.
After capturing a Control Point, you'll gain access to a supply room that features multiple chests, backpacks, and bags filled with everything from guns and armor to resources and trinkets. While this may seem like a one-time boon for your character, it's actually not. Over time, these supply rooms regenerate their loot — with the exception of the biggest chest found in each one — meaning you can stop by periodically and pick up higher-level gear and more resources. It's a quick and painless way to help build up your arsenal and gather materials for your various projects.
Extra credits
Because of the number of guns and armor pieces found organically throughout D.C., you won't have to spend your credits on these items during the game's early stages. However, you'll still need them for certain things, especially crafting. There are plenty of ways to earn credits, be it through completing certain missions or selling old gear, but one of the easiest ways to line your pockets is to sell your junk.
In The Division 2, there are so many crates, chests, and bags to loot. While you'll mostly find valuable items that will help you on your journey to the endgame, sometimes you end up with useless items known as Trinkets. These items have no purpose, yet they sit in your inventory, almost out of sight unless you go scrolling through your Resources menu. The game offers an easy solution to get rid of these items: sell them at the vendors found in your Base of Operations or at Settlements. When in a vendor menu, there's a one-click option to sell all your Trinkets. Doing so will net you some extra coin for almost no effort.
Enable parkour mode
The game's standard control scheme makes it so you have to manually climb over cover and shimmy up ledges. It's a simple button prompt, but it might not be everyone's ideal way of traversal. If you don't like worrying about vaulting over cover while sprinting, there's an easy option you can enable to alleviate that. It's called Parkour Mode, and it allows you to automatically vault and climb when running.
It's a great little addition to the game, and you can turn it on in no time. All you have to do is pull up your "Settings" menu, head to the "Gameplay" tab, and it's the first available option. It may take some time to get used to this auto-climb though, as you can now easily miss the opportunity at sliding into cover and instead jump right over it. Parkour Mode means that, when running toward a wall or barrier, you'll need to press the correct button as soon as possible if you need to snap to it. If you time it wrong, you could leap over and put yourself right in the line of fire.
Despite the slight learning curve involved, this new option really helps if you want to focus on repositioning yourself during battle.
Playing solo? Unlock the Hive Reviver.
The Division 2 encourages you to play with friends, or at least like-minded strangers. It's a tough experience, featuring large numbers of enemies with very strong AI, and that doesn't exactly make it easy to play the entire game solo. However, if you truly prefer to go it alone, there's a specific skill you'll want to unlock early on in the game: The Hive Reviver. Frankly, it should be the first one you unlock if you're at all worried about struggling against big waves of enemies.
This skill advertises itself as a way to revive your friends from a distance. You can toss the Hive toward downed allies and bring them back from the dead without ever leaving cover. But the Quartermaster's Skill tree doesn't tell you that the Reviver will automatically bring you back to life if you're downed. As long as your Hive isn't on cooldown when your health hits zero, you'll be back up on your feet in just a few seconds.
Make sure you explore underground
To successfully prepare for the future of this game — basically everything that comes after Level 30 — you're going to need all the high-tier weapons and armor you can get your hands on. That means doing the main and side missions alone won't cut it. You need to spend a good amount of time exploring the world, searching for supply caches, capturing Control Points, and finding every chest and backpack available.
You have to search the high ground and low ground to find the necessary gear, but you should also make sure to explore underground. While on your journey, you'll come across manholes — highlighted by in-game alerts — that you can climb down. In the underground areas, you can find more chests and weapons cases, and also special cabinets affixed to various walls. These cabinets contain new items called faction keys. The keys unlock caches, small boxes containing rare gear, found throughout the different faction-controlled areas. Make sure you take some time to farm underground, because the loot you'll find in these caches will be worth the effort.
For faster leveling, get XP perks early
The road to Level 30 isn't exactly a short one. It will take quite a few hours to reach that point and start diving into the endgame content. The shortest road to the big three-oh involves doing every story mission, as well as focusing on side missions once you reach higher levels (since their XP rewards scale up based on your level). However, one thing you should absolutely do as early as possible is to load some SHD Tech points into the Accolade perk. It will help shorten the grind.
The Accolade perk awards you bonus experience for headshot kills, multi-kills, environmental kills, weak point hits, and surviving for long periods of time. It takes just five SHD Tech points to max out this perk, and you should be able to get that many in the first few hours of the game. It's truly worth it, as the extra XP adds up over time, meaning you'll max out much more quickly than players without it.