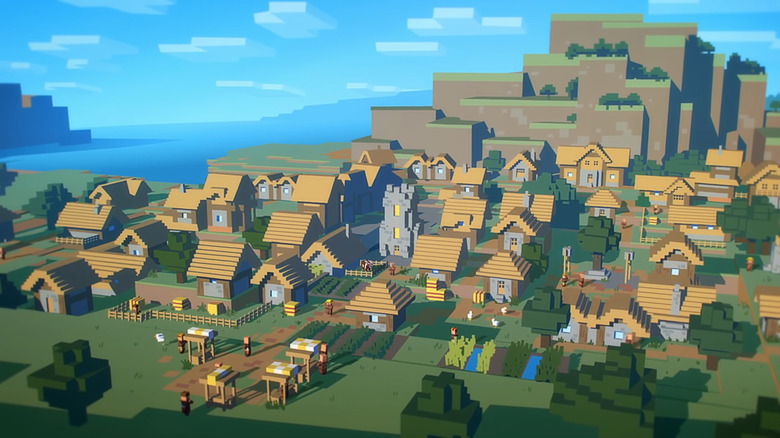
The Best Way To Farm Iron In Minecraft

Obtaining a decent supply of iron in "Minecraft: Java Edition" is an essential part of getting to the ending of the game, but it can be even more complicated than finding Netherite itself. A stable source of iron is essential for players looking for a more out-of-the-sandbox experience than a speedrun, as it changes the way a player is able to approach resource management in the game. A majority of farms for nearly any kind of block or item is heavily reliant on iron-made components like Hoppers, Pistons, Rails, Carts, and more.
However, unlike most other types, iron farming has a great deal of variation from one design to another because it relies on spawning and killing iron golems using villager mechanics. Complex and fickle, the algorithm that villagers use to spawn iron golems has many moving parts that provide very strict requirements. However, they have incredible flexibility when it comes to the actual farm design. Many creators have taken their own crack at designing the "best" iron farm for themselves, each with unique pros and cons.
So, of the vast number of iron farm designs there are, which is the best one? The answer depends on you — the best way of farming iron is simply the method that fits your needs on a basis of cost-versus-output. Here's a breakdown of the easiest early game setup, iron golem spawning mechanics, and how to use them to choose or create the best upgraded designs for yourself.
The best way to set up your day one iron farm
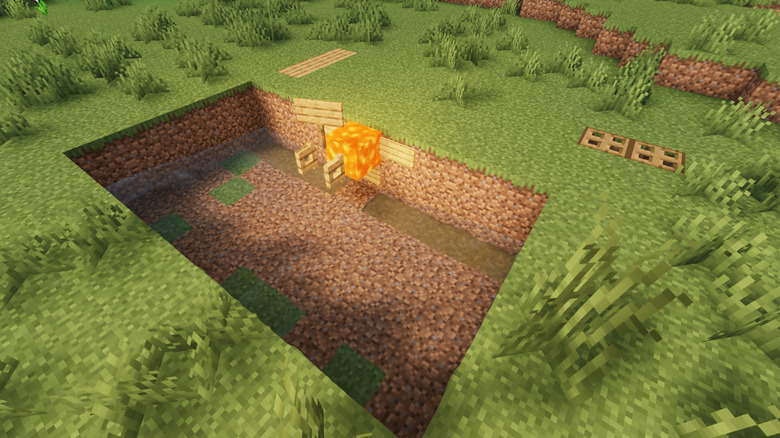
While there are tons of search results for an "easy iron golem farm," there are only a few truly "day one friendly" farms that require no iron to begin with. Of them, the best one is Ianxofour's design, which involves using a 9 block by 11 block area mostly underground. You dig out a seven blocks deep, 3-by-3-by-3 box for the villagers and the zombie, using a simple trap to lure the zombie into a boat. Then you dig a two blocks deep, 9-by-5 spawning pit next to it with strategically placed dirt blocks to trap and suffocate the golems upon spawning. Make sure that the entire surface area in an eight block radius from your farm is at the same height (seven blocks above the beds), or you'll have golems spawning outside the pit.
As you start getting your first iron ingots, the first priority is to craft a bucket to place water at the corners of the spawning pit that will sweep the golems and drops into one collection area (note that you need to spawn-proof the blocks along the opposite wall before adding the water). After installing the water, you can use the bucket to install the more efficient lava kill system and get rid of the floating dirt blocks. Then, you can craft a hopper to automate the process, and voila — your iron farm is up and running.
Making improvements
While this design is extremely beginner-friendly, there are a few alterations to make to make it truly 100% hassle-free:
- Breaking all the beds in the village instead of just six ensures that all villagers are forced to pathfind to your farm at nightfall, guaranteeing that you'll have enough villagers to start the farm.
- Marking the initial 3-by-1 hole with special blocks instead of dirt helps you keep track of where the villagers are, in case you want to build anything around the farm without disrupting the process.
- Using a shovel instead of a hoe on the eight dirt blocks along the wall offers much more reliable spawn-proofing, as dirt paths never revert to regular dirt without direct player intervention (unlike tilled dirt, which has a chance of reverting before getting irrigated if you're unlucky enough).
Of course, there are other "day one" designs that operate on the same principle. However, Ianxofour's design comes out on top because it has the smoothest and easiest solutions to a number of the most bothersome parts of iron farming:
- Moving villagers into position easily, with no boats, minecarts, or other forced movement.
- Acquiring and despawn-protecting a zombie smoothly and without the use of a nametag.
- Reliably funneling iron golems into one area without extra spawn-proofing via strategic disqualification of the spawn radius (eight blocks horizontally and six blocks vertically in any direction from the villager).
- Leaving room for future upgrades that are very easy to implement after acquiring more iron.
How to increase efficiency with Golem management
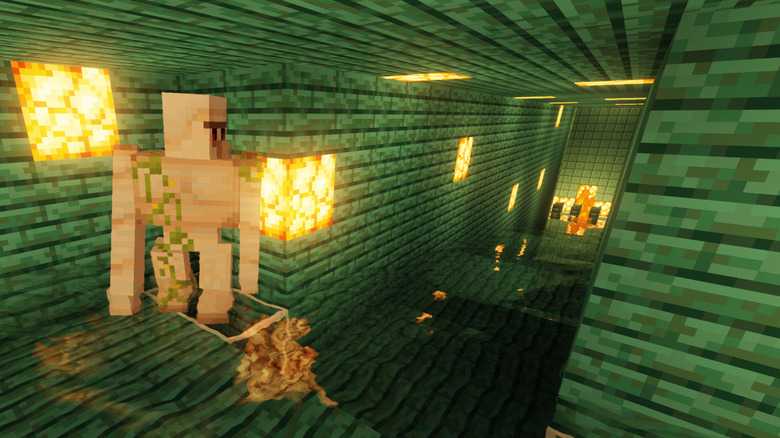
When it comes to mid-tier upgrades, a steady supply of iron opens up so many possibilities. From height-based towers to underground builds, every farm has its pros and cons. Picking the best fit for your survival world comes down to understanding the iron golem mechanics and knowing what designs will and won't offer you your desired cost-to-output ratio. The most important mechanic when increasing output is that Villagers will not spawn a golem if there has been a golem within 16 blocks of them for the past 30 seconds. As 30 seconds is the shortest interval for spawning, all iron farm upgrades boil down to ensuring all spawn conditions are met as close to this interval as possible.
A key factor in shaving down spawn times without constant player input is how fast the golem is taken out of the detection radius. A vast majority of mid-game farms use water and gravity to push the golems away, while some complex designs use Nether Portals. There are pros and cons to both. Water is much slower and can cause a few seconds of delay depending on the size of the spawning platform, but it only requires the Overworld to be loaded. On the other hand, Nether portals are instantaneous and more efficient, but they can cause significant server lag by repeatedly loading and unloading the Nether dimension each time a golem passes through.
How to increase efficiency with Villager and Zombie management

The server lag from Nether portals can be mitigated by maintaining the Nether dimension with a constant stream of iron golems, making it ideal for farms with multiple spawning units. However, there are a few factors to consider when managing multiple spawn units — one, that you have to space them far apart to avoid them interrupting each others' spawn timers, and two, that all three villagers of each unit need to be within line of sight to a zombie.
Unfortunately, acquiring zombies for multiple units and despawn-proofing them — via either a nametag or trapping them in a boat or minecart — can become a real time sink. Not to mention the fact that villagers have a panic cooldown timer as well, and need to have their line of sight to the zombie broken every couple of seconds to ensure this doesn't delay spawning. There are a few ways to do this. In order of least to most reliable:
- Strategic placements of blocks and villager beds to ensure line of sight is broken when running away and re-established when turning around or trying to sleep, which requires no advanced materials.
- A soul sand bubble column that automatically bobs the zombie up and down, which requires nether access.
- A redstone contraption that periodically pushes the zombie in and out of the villager room, which requires advanced redstone components as well as extra space to install them.
Learning to discern iron farm designs

With all these different mechanics, it's no wonder there are so many different iron farm designs, ranging from razor-edge optimization, to brute force quantity, and just plain fun to watch. Some designs even take lowered efficiency in favor of aesthetics, turning the farms into towers or pagodas — which incidentally open up room underneath the farms for extensive on-site storage and item-sorting systems to filter out the poppies. However, when it comes down to it, all iron farms are simple mix-and-match combinations of ideal solutions to the same core mechanics:
- All blocks within the spawning radius must either funnel into a kill chamber or be spawn-proofed.
- Golems must be killed moved away from the Villagers as soon as possible, with no other golems coming within the detection radius.
- Villagers must have beds, a safe distance from the hostile mob, and a way to break line of sight with it at least once every few seconds.
- Other factors like aesthetics and item sorting/collection circuits should not interrupt the process.
Once you understand what makes an iron farm work, it's not hard to adapt an existing design to fit your ideal plans — or maybe even design one yourself. The truth is, there is no objective "best" way to farm iron that fits everyone's world. The real "best" iron farm design in "Minecraft" is your iron farm design.