How To Make And Use A Beacon In Minecraft
Starting out as a simply blocky building game, "Minecraft" has come a long way to becoming an intricate survival sandbox with complex mechanics and machines that the player can build. And no, this isn't just talking about the next-level impressive computers built inside "Minecraft," or any of the other bonkers builds that players have come up with over the years. Even without advanced Redstone knowledge, players have in-game access to some incredibly in-depth and useful contraptions like the Respawn Anchor, the Conduit, and the Beacon.
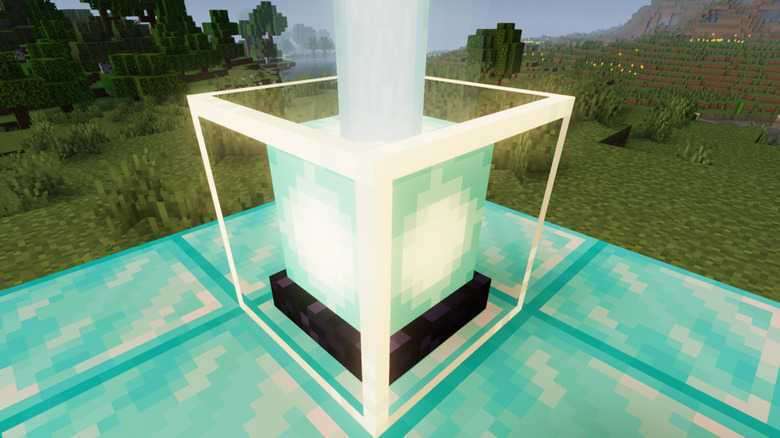
Of these, the Beacon probably has the most universal in-game utility — added in 1.14, this interactable block emits a bright skyward beam (that can be color-tinted with tinted glass blocks) and an effect field that constantly applies a buff to every player within range. With the available effects ranging from mining speed increases to health regeneration, these beacons are practically a must-have for any advanced base or building project.
The only problem is, they're somewhat complicated to set up for use — not to mention the rarity of the materials involved in crafting one to begin with. Here's a rundown on where to get the materials for, and how to set up and use a Beacon in "Minecraft."
Gathering the materials to craft the Beacon
First, you'll have to gather the materials to make the beacon: five blocks of glass, three blocks of obsidian, and one Nether Star. While the first two materials are easy enough, the Nether Star is somewhat more problematic as it only ever drops from killing the Wither, a boss that rivals the strength of the Ender Dragon.
Spawning a Wither in the first place is no small feat, either. You'll have to grab four blocks of Soul Sand (or Soul Soil) and three Wither Skeleton Skulls from the Nether, the latter of which only drops from Wither Skeleton mobs, which, in turn, only spawn in Nether Fortresses. Just suit up with your best gear, grab a sword (preferably enchanted with at least one level of Looting), and get to exploring. With any luck, you should be able to find a fortress with a few Wither Skeletons spawning in the hallways before long.
After that, you'll have to arrange the Soul Sand in a T formation and place the Wither Skeleton Skulls on top (much like you would to create an Iron Golem from iron blocks and a carved pumpkin) to spawn the Wither. Prepping the killing area beforehand will go a long way toward helping you kill the obnoxiously strong monster without too much of a struggle. You can do so by setting up some sort of auto-suffocation chamber, or just preparing a platoon of iron golems to do the job for you.
Setting up the Beacon's base
Once you have the Nether Star, put it in the center of a crafting grid with the three obsidian along the bottom and the five glass surrounding the sides and top, and voila — you have your first Beacon in hand.
However, you might not be finished gathering yet. Actually using the Beacon requires them to not only be placed with an unobstructed view of the sky or Nether ceiling bedrock (with transparent blocks allowed to be placed between), but they also need to be sitting on a pyramid of mineral blocks in order to work (with more layers providing stronger effects). These pyramids can't be hollow, either, so you'll need anywhere between 9 to 164 blocks to activate a single Beacon — that's between 81 and 1476 individual materials.
Of the eligible blocks— iron, gold, emerald, diamond, and Netherite — iron is easiest to obtain en masse by setting up even a simple iron farm. However, if you have better access to any of the other materials, it's worth noting that the blocks in the pyramid can be mixed and matched without affecting functionality.
Additionally, you can place multiple beacons on the same base pyramid so long as you extend the pyramid layers out to accommodate the extra Beacons — for example, six beacons grouped together in a 2-by-3 formation can become functional on a 4-by-5 base layer of mineral blocks, followed by 6-by-7, then 8-by-9, then 10-by-11 block layers for a full-tiered base.
Using the Beacon to gain persistent buffs
If you've placed the Beacon correctly, it'll emit a vertical beam, and you can start using it. The beacon will constantly apply a selected effect every four seconds to every player within range, with the range and effect duration scaled by how many pyramid layers the base has.
Simply right-click or press the "use" button on it to pull up the interface. From there, you can pay one material unit — either one iron ingot, gold ingot, Netherite ingot, diamond, or emerald — to enable one Primary Power, some of which are locked behind pyramid tiers.
One pyramid tier offers you:
- Speed I, which accelerates player movement.
- Haste I, which accelerates mining and attacks.
- An effect radius of 20 blocks and a duration of 11 seconds.
Two pyramid tiers:
- Resistance I, which raises resistance to most forms of damage.
- Jump Boost I, which extends jump distance.
- An effect radius of 30 blocks and a duration of 13 seconds.
Three pyramid tiers:
- Strength I, which raises melee damage.
- An effect radius of 40 blocks and a duration of 15 seconds.
At four pyramid tiers, you'll have an effect radius of 50 blocks and a duration of 17 seconds, as well as the option to choose one of two simultaneous Secondary Powers: either Regeneration (which regenerates health) or a level boost to the Primary Power. To change the effect, just feed it another material to enable a different selection in the same manner.